How to Create a Group Chat
This guide will show you how to quickly create a group chat to collaborate with your colleagues. All participants are selected directly from the company directory.
Summary of Steps
The flow for creating a group is simple and flexible:
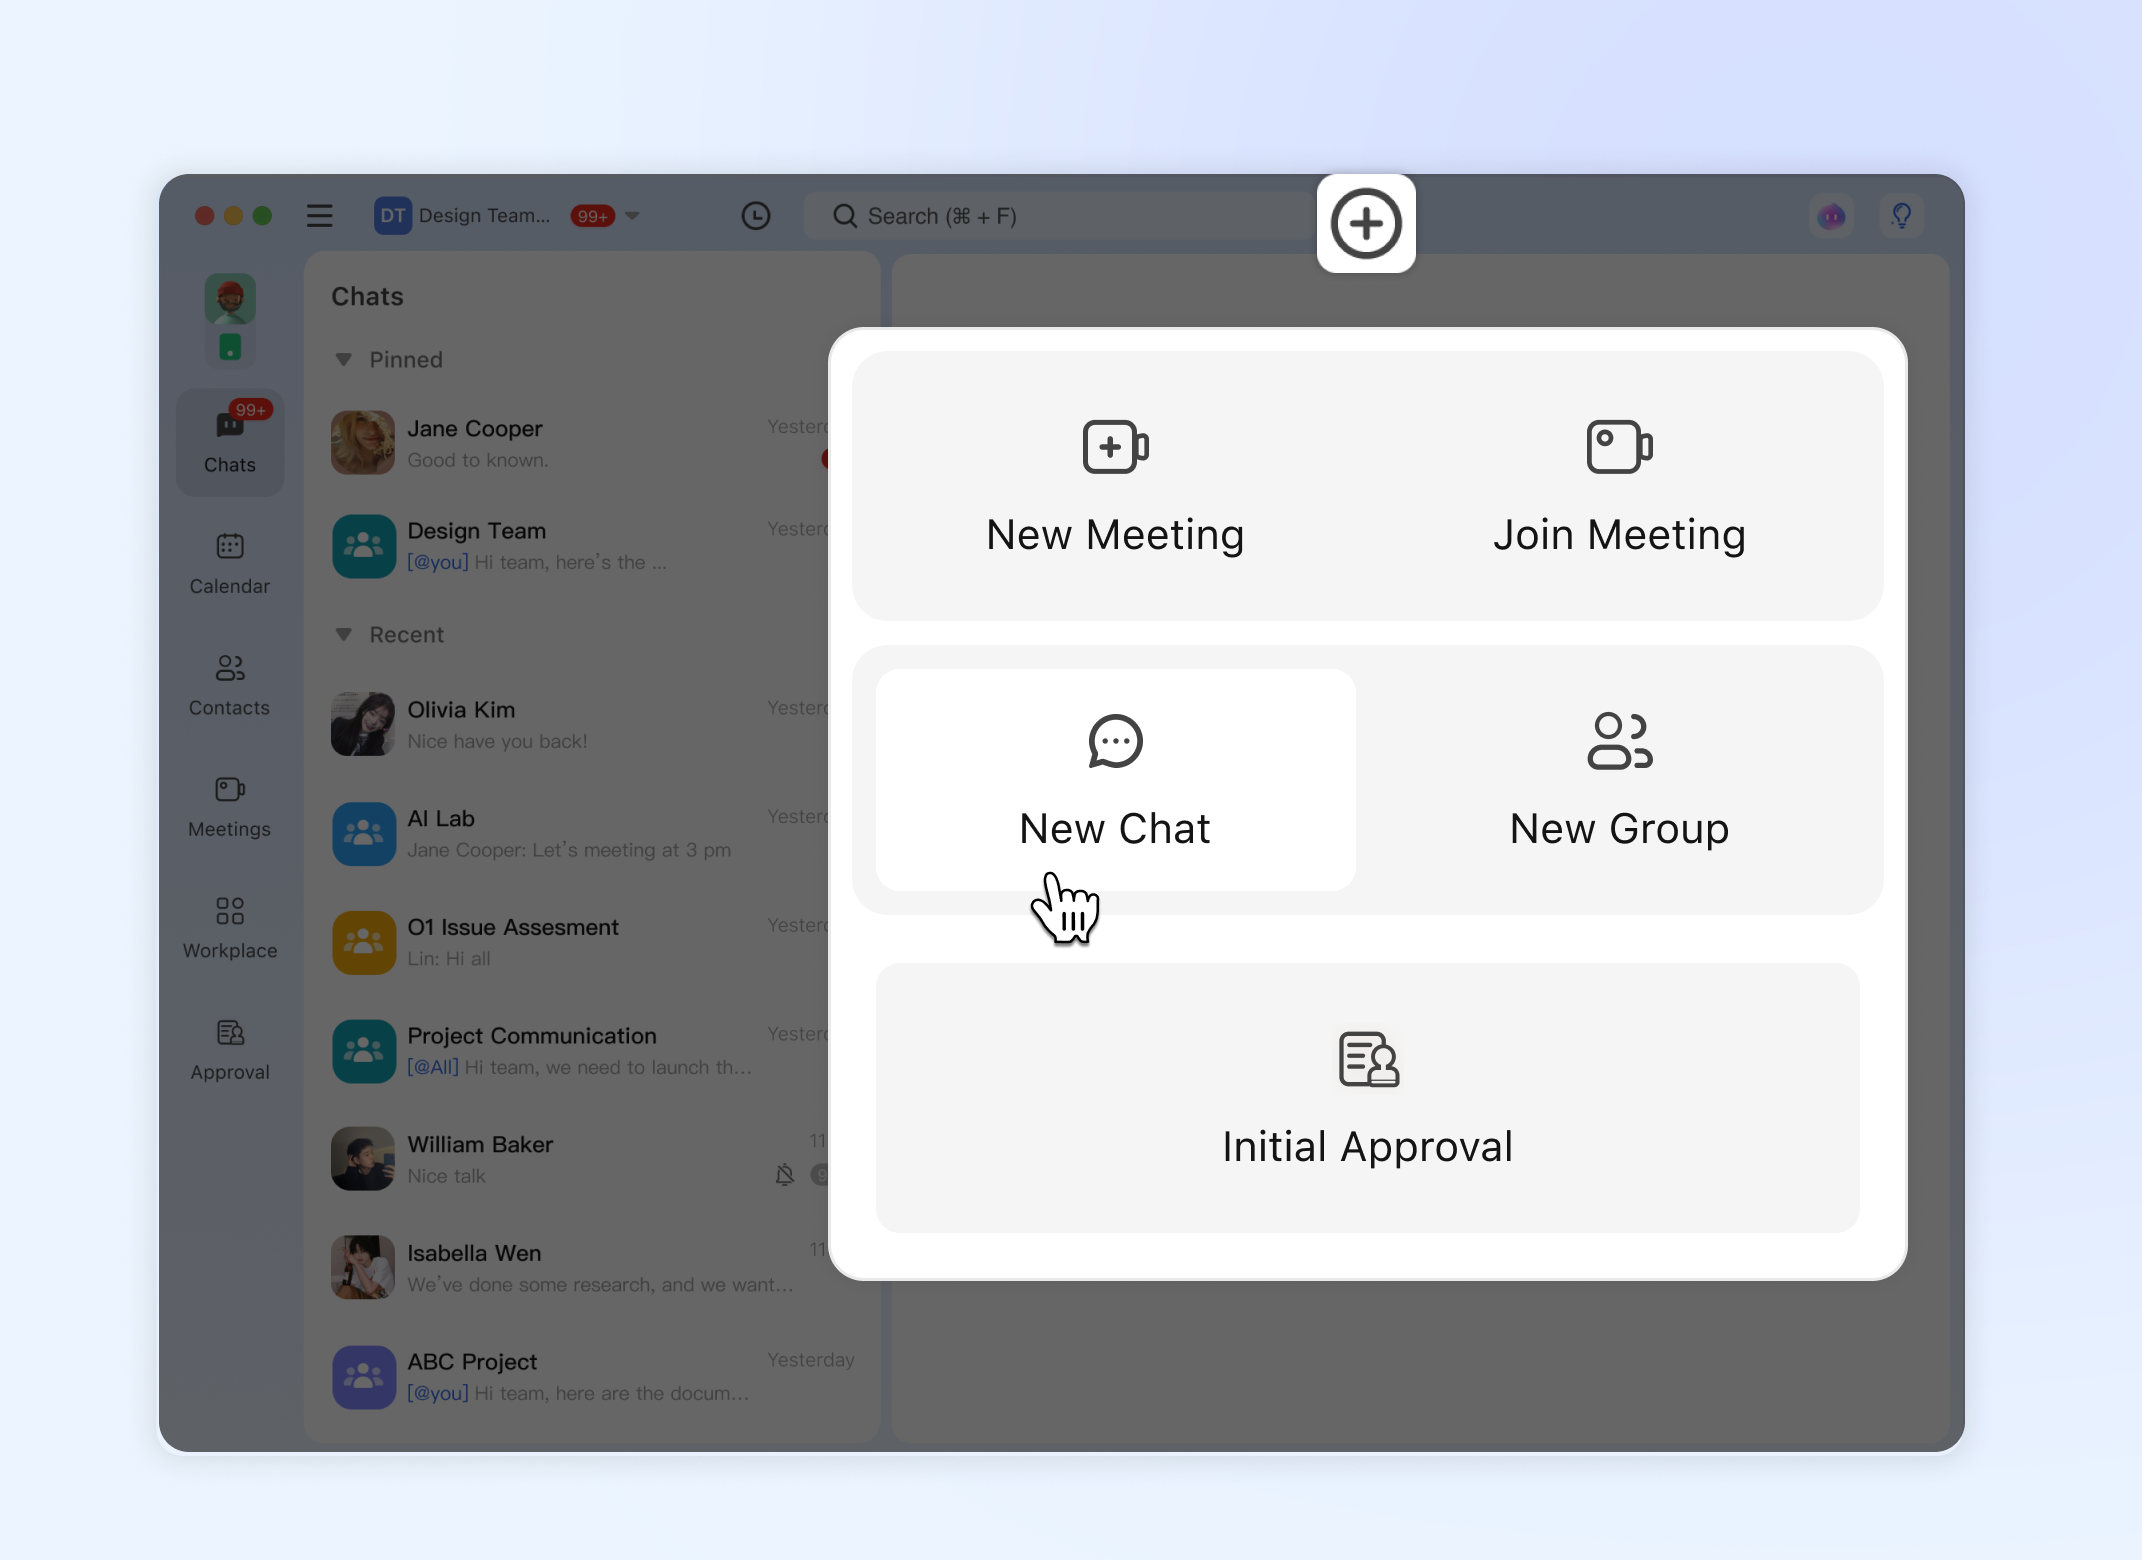
- Click the + button.
- Choose either:
- New Group: Name your group first, then select members.
- New Chat: Select members first, then name your group.
- Select members from the company directory.
- Click Create.
Method A: "New Chat" (Members First)
- 💻Desktop Users
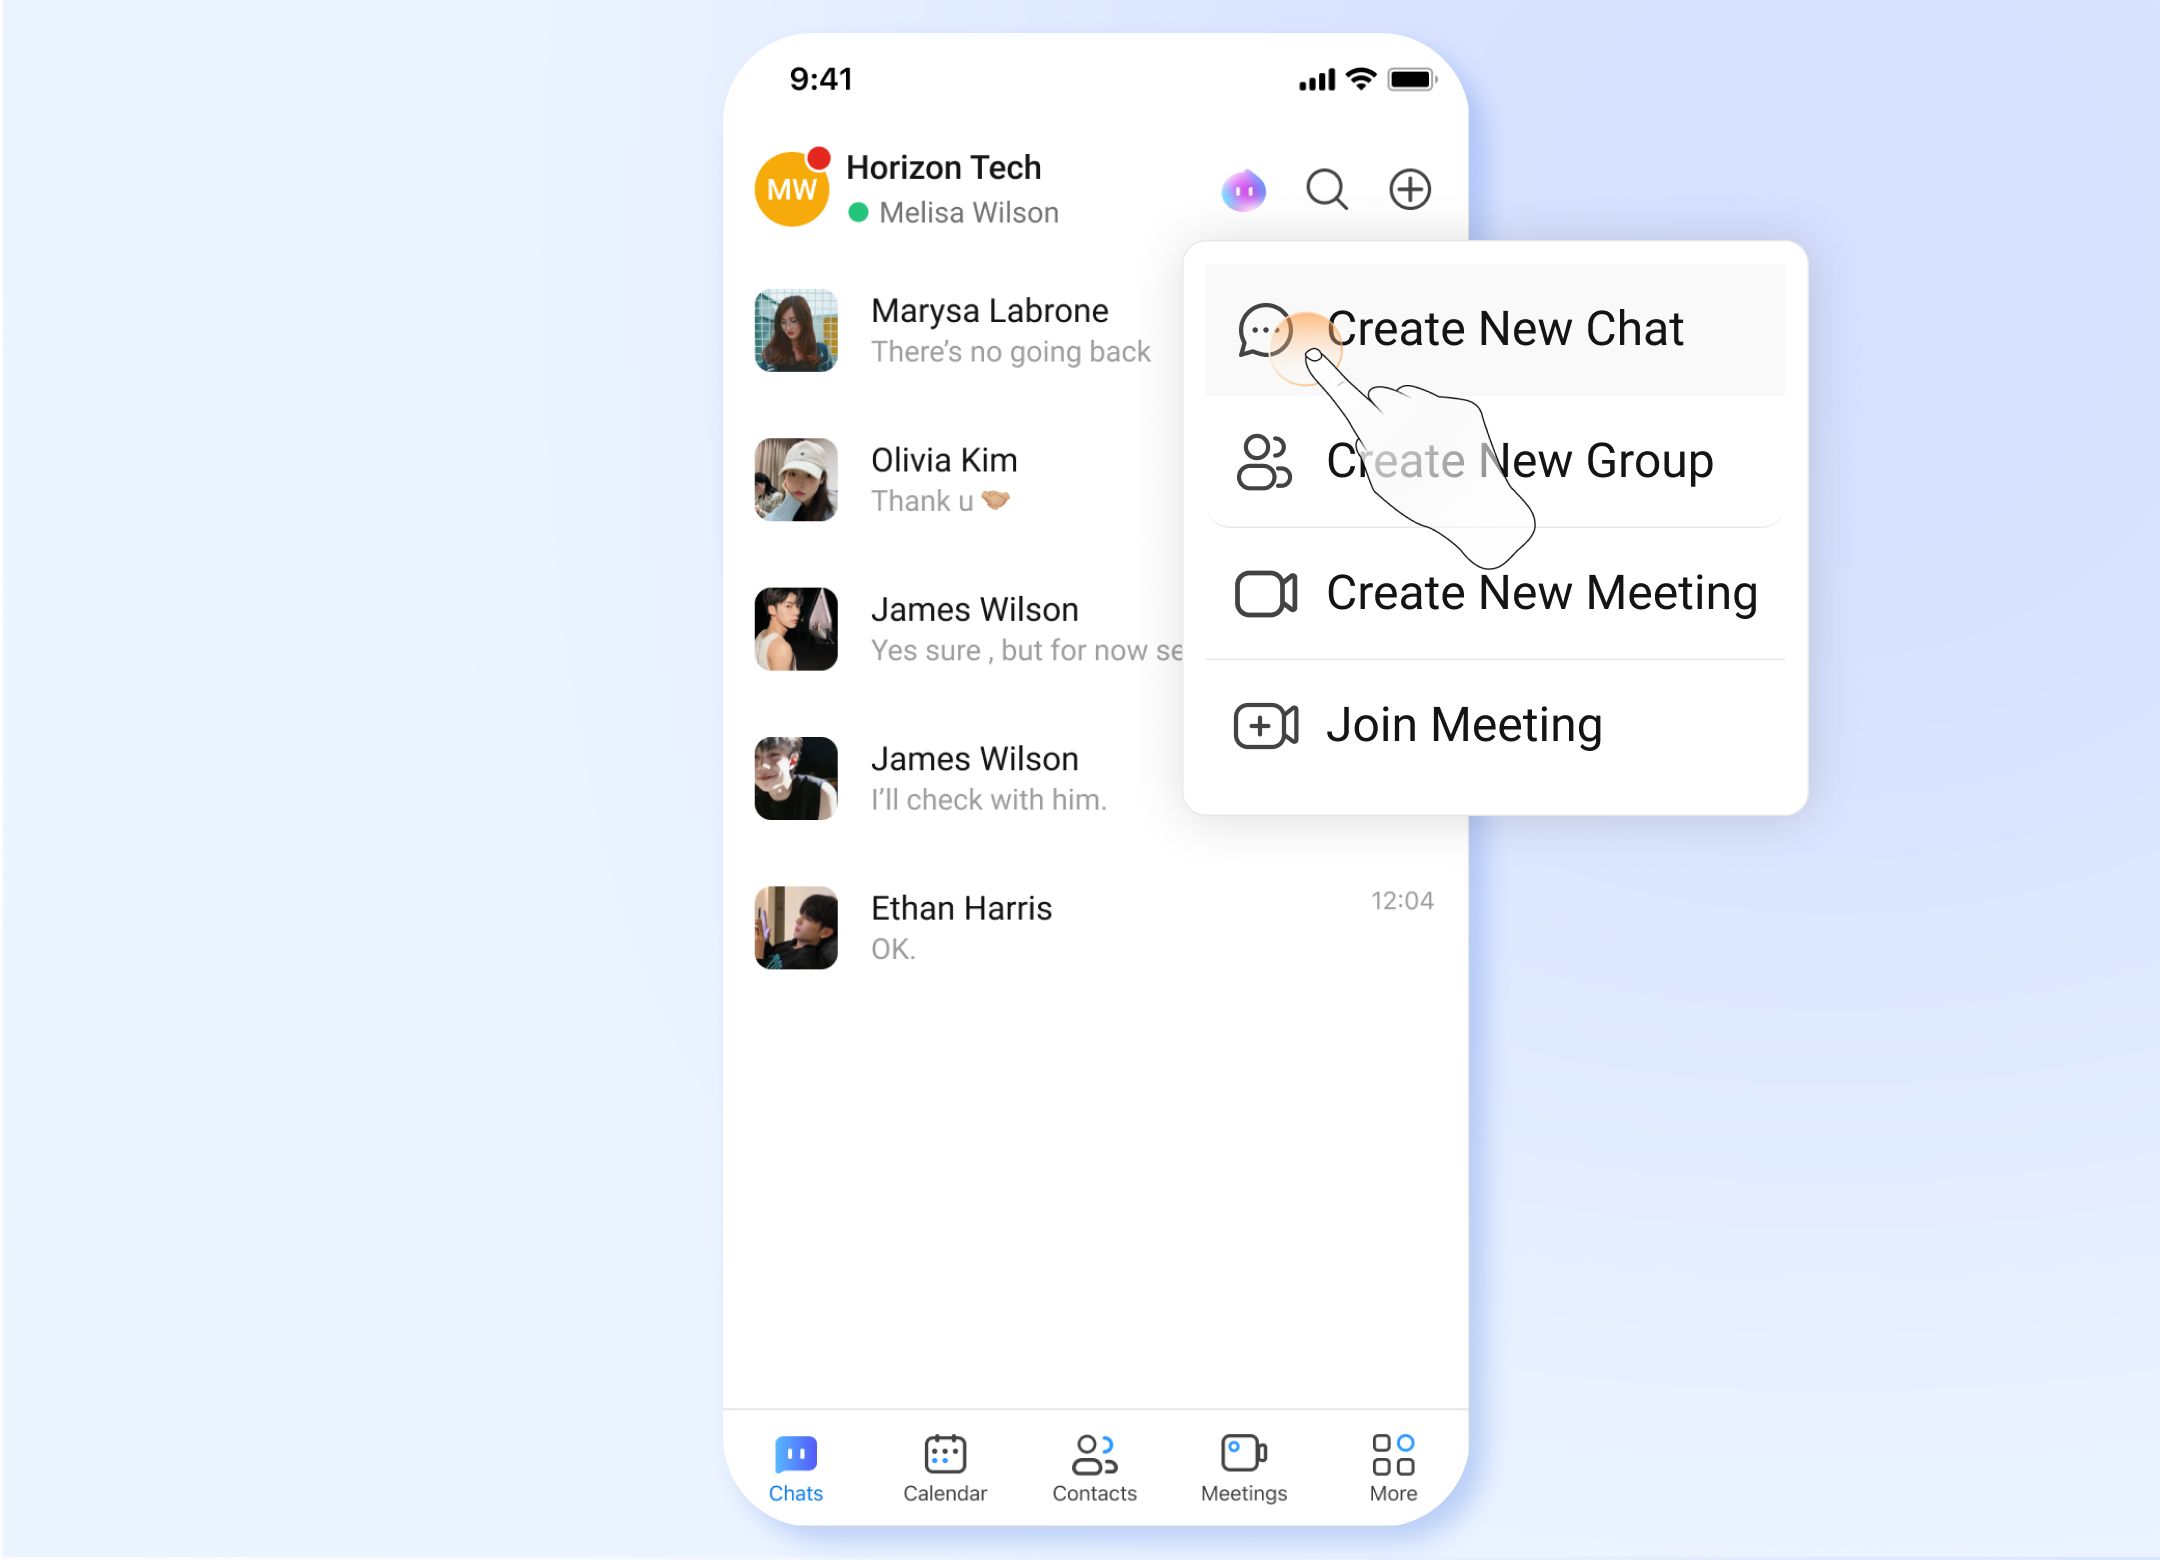
- 📱Mobile Users
This method is best when you start with a list of people and then decide on a group name.
Step 1: Initiate a New Chat
Click the + button and select New Chat.
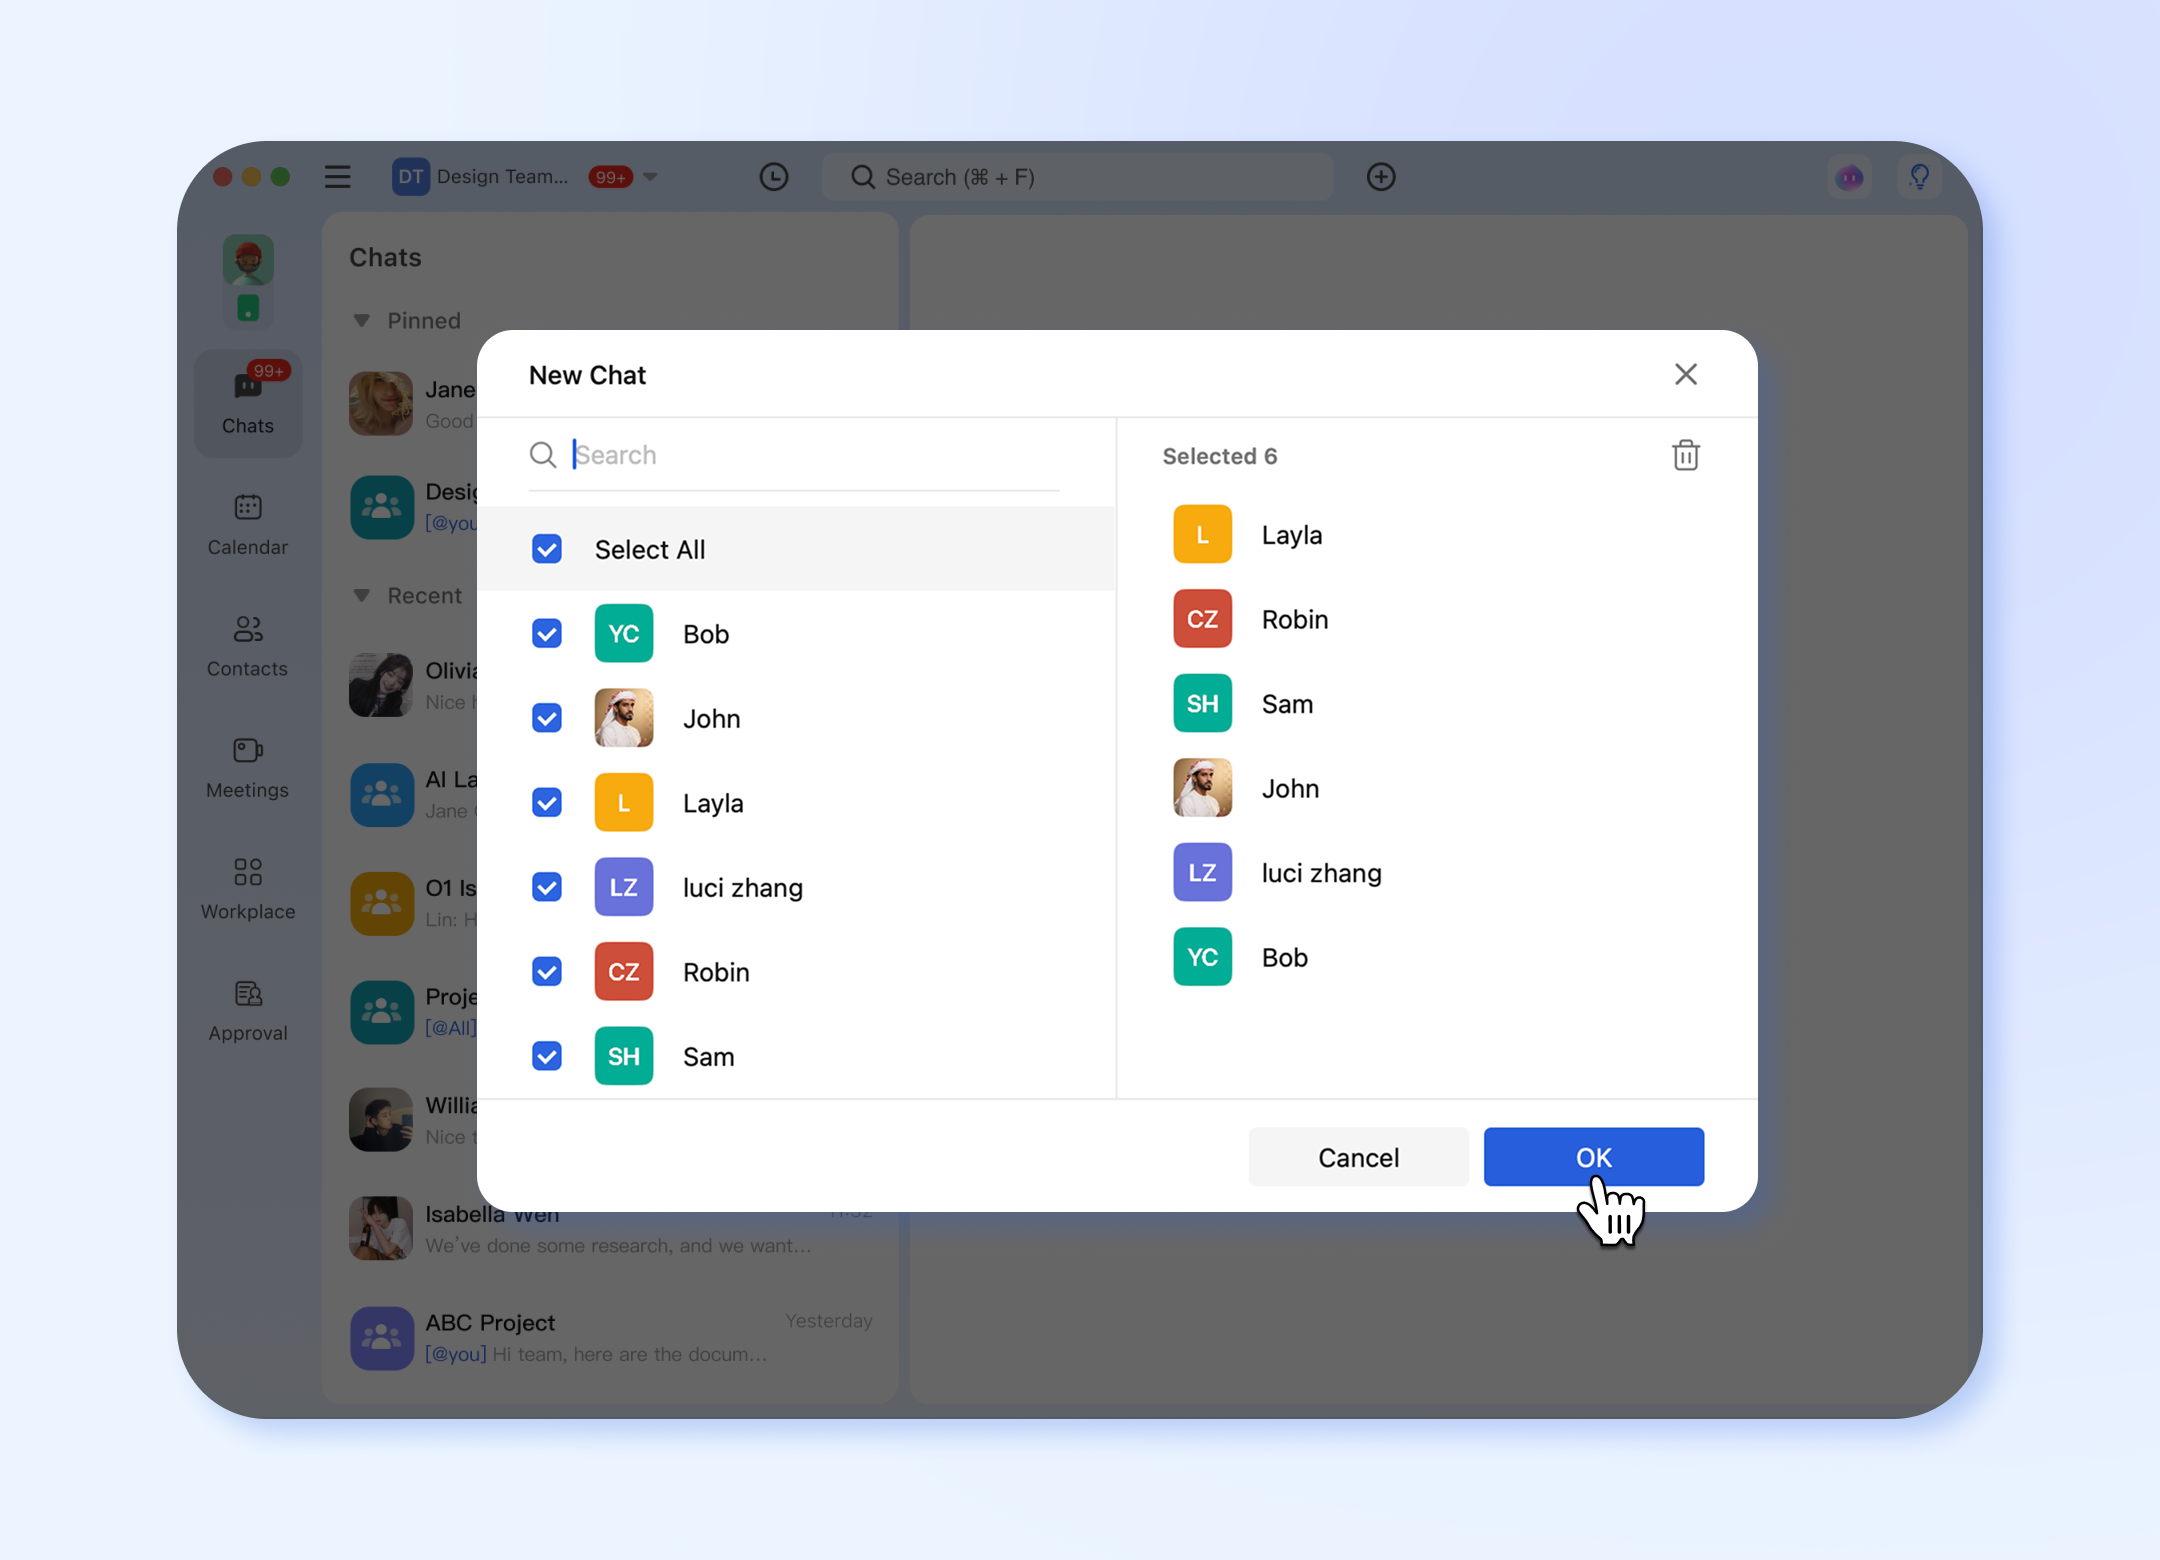
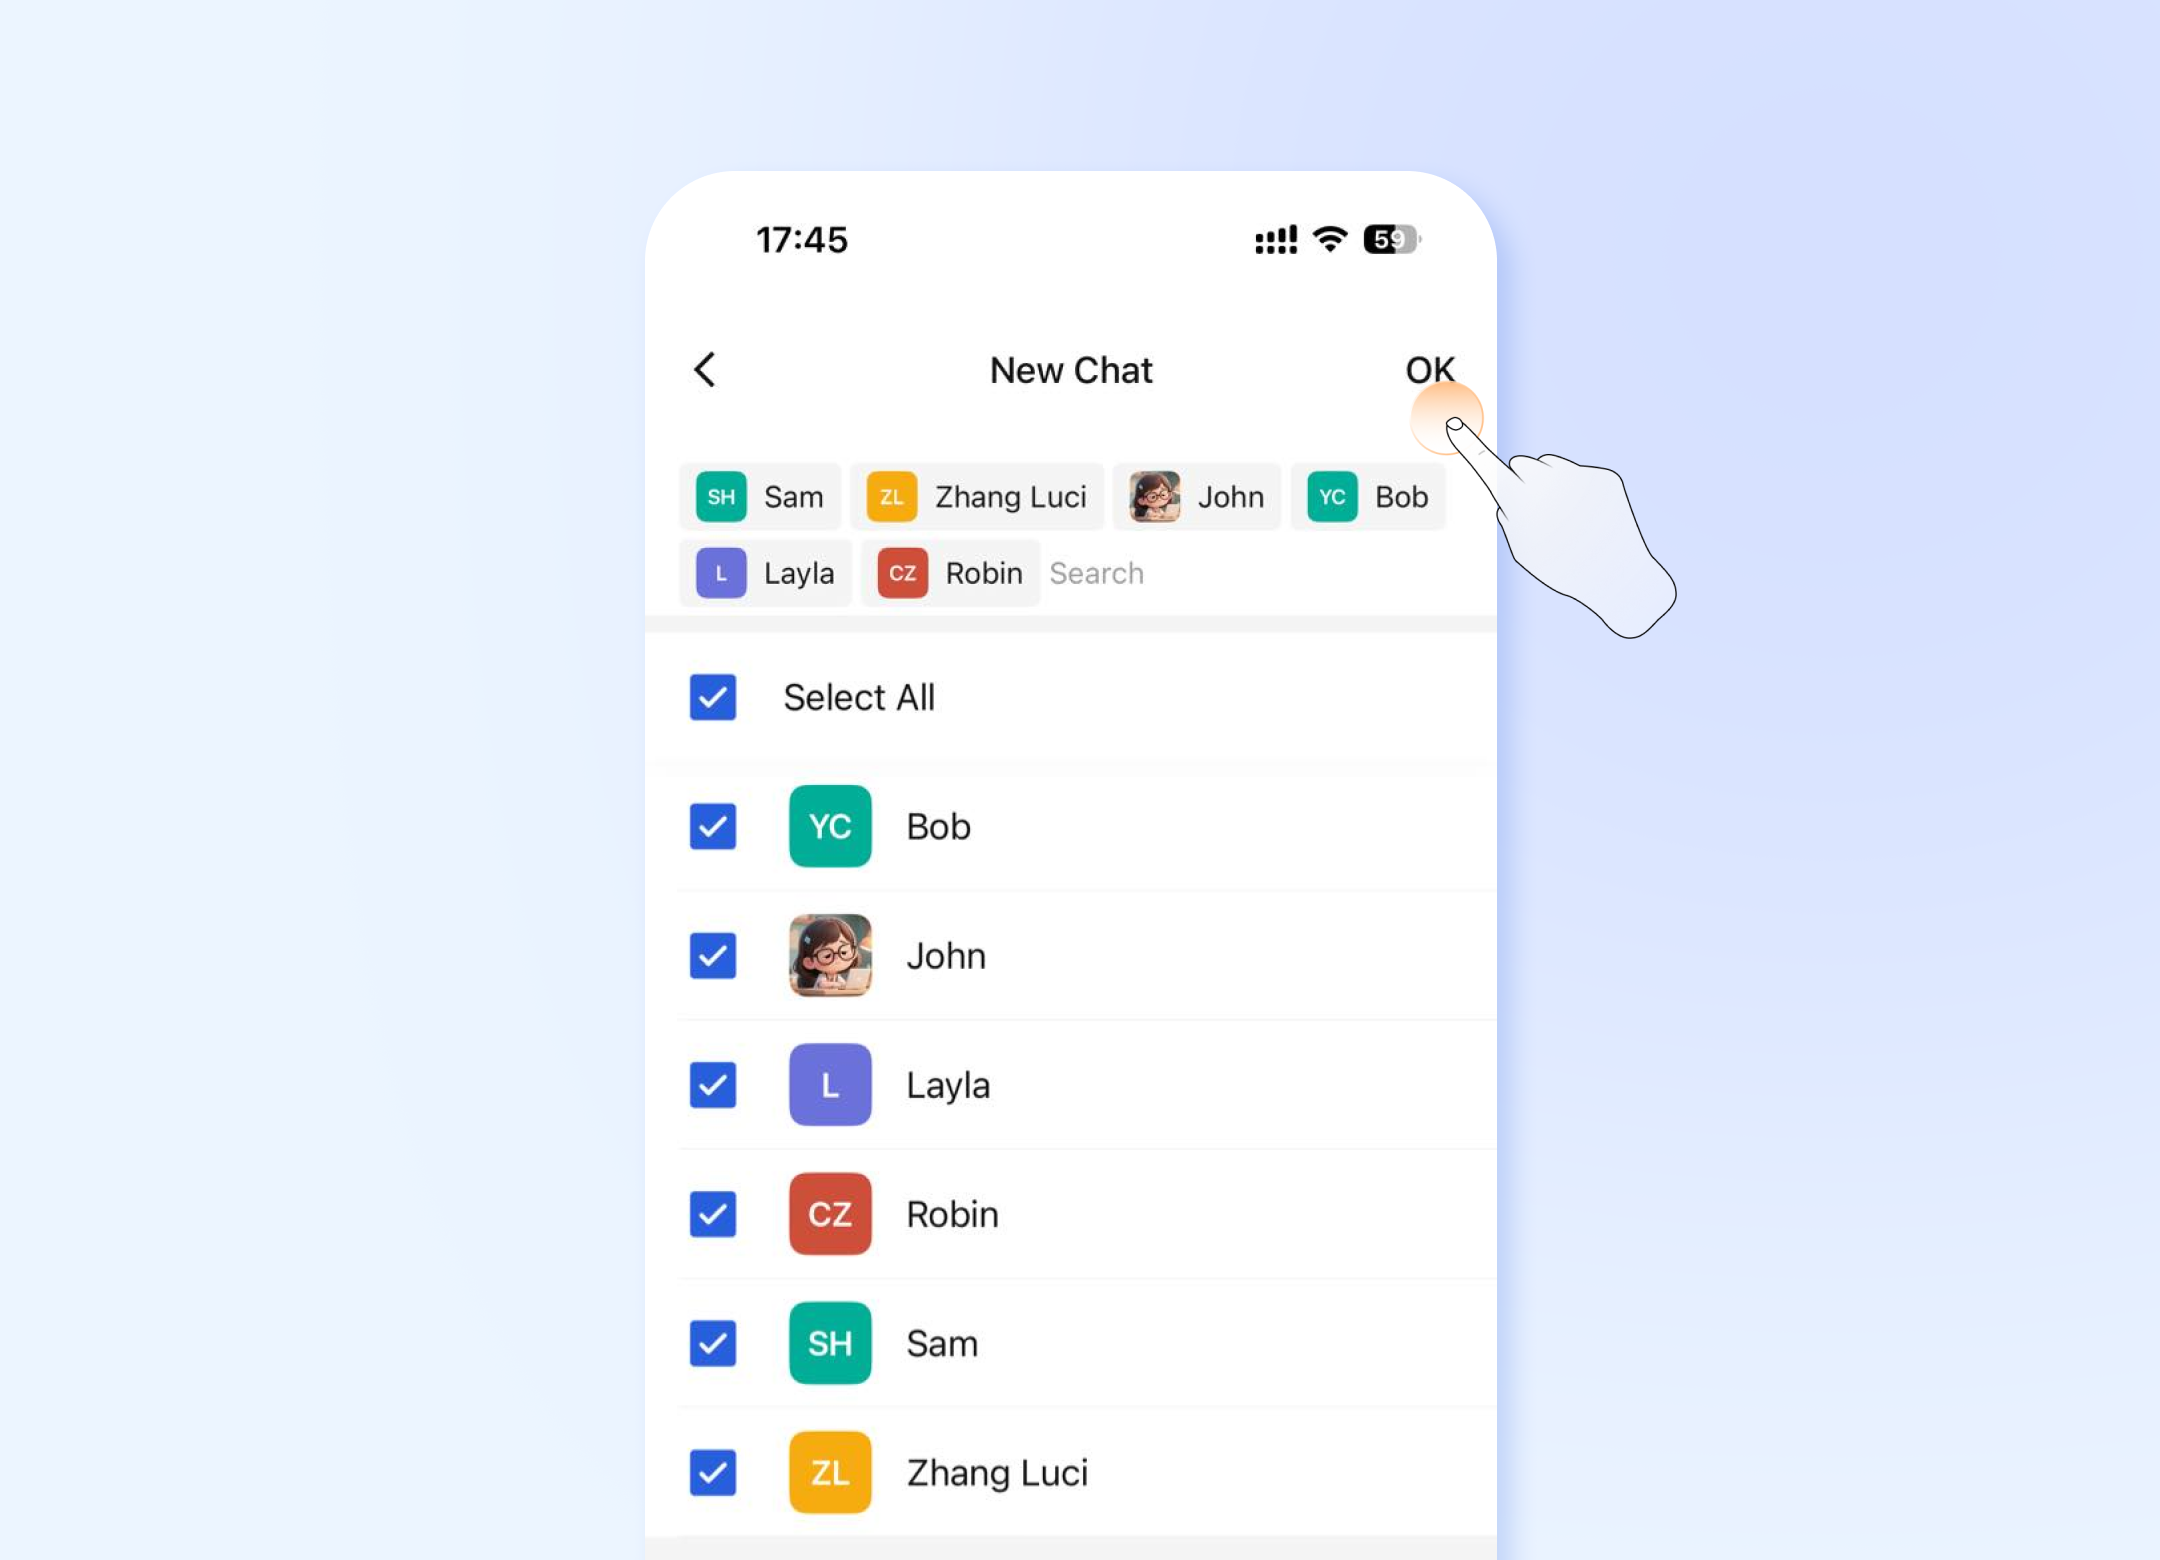
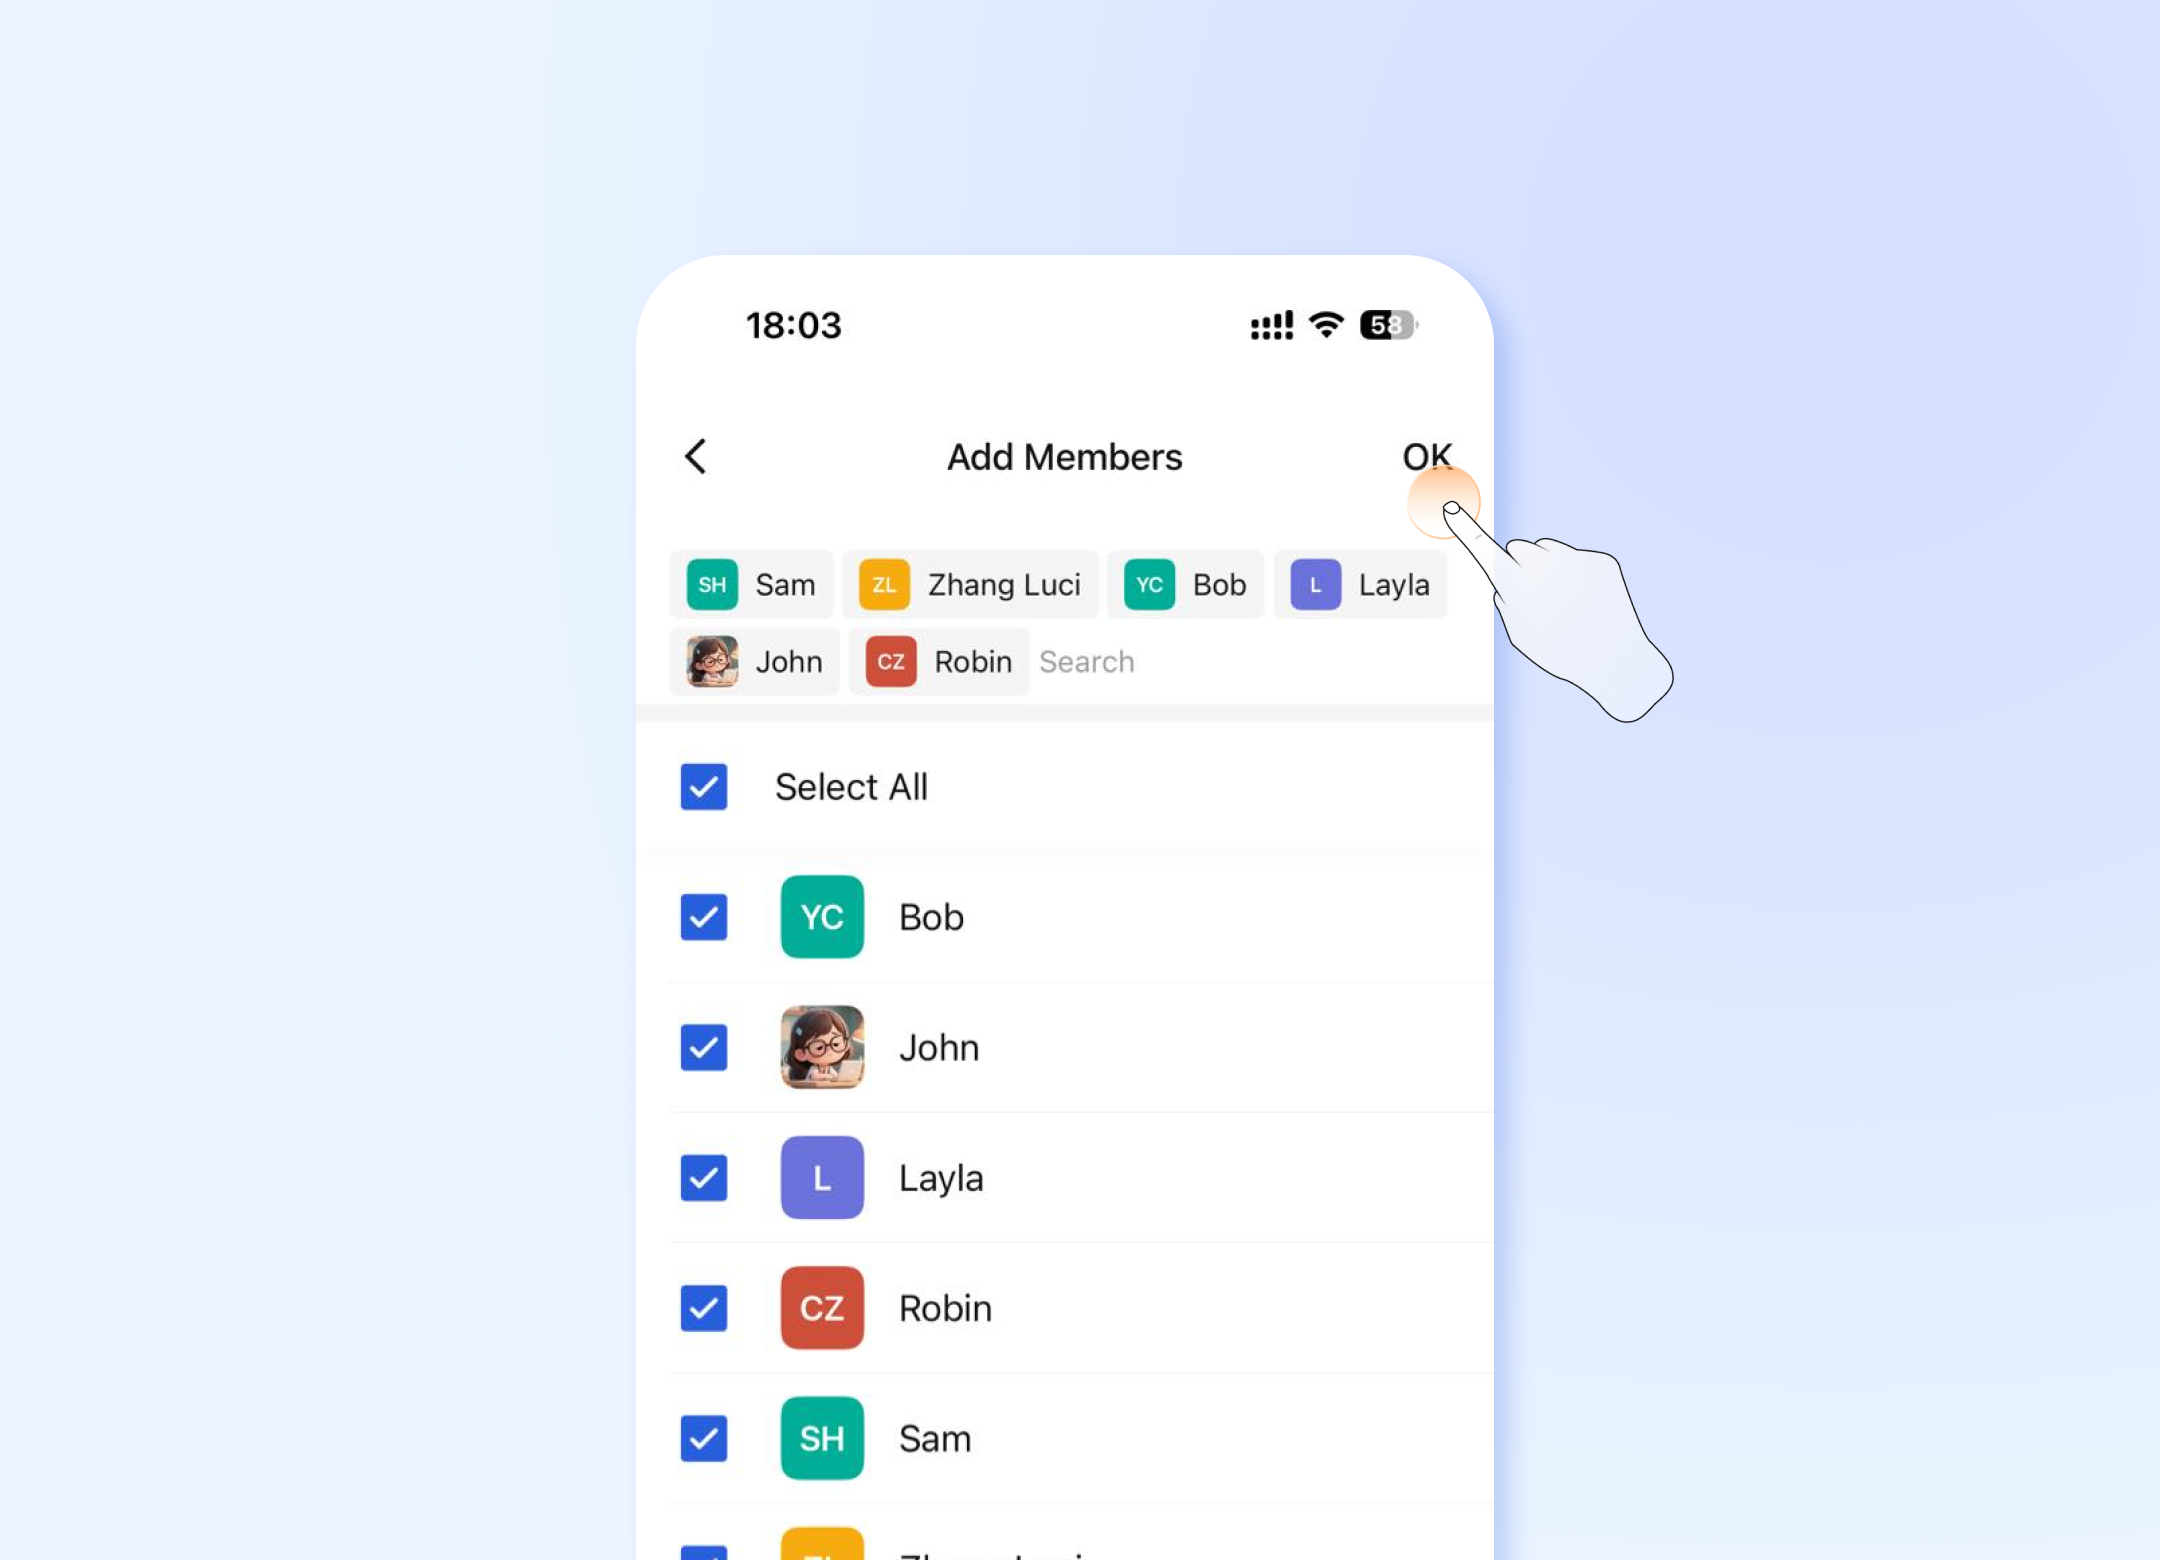
Step 2: Select Members
You will be taken directly to the company directory.
- Select members individually by clicking on their names.
- Alternatively, use Select All: Click the Select All button to add all employees in the current view or directory.
- ⚠️Important Notice: If you are about to add everyone to this group. Please confirm this is necessary before proceeding.Please use this feature with caution.
- After selecting members, click OK.
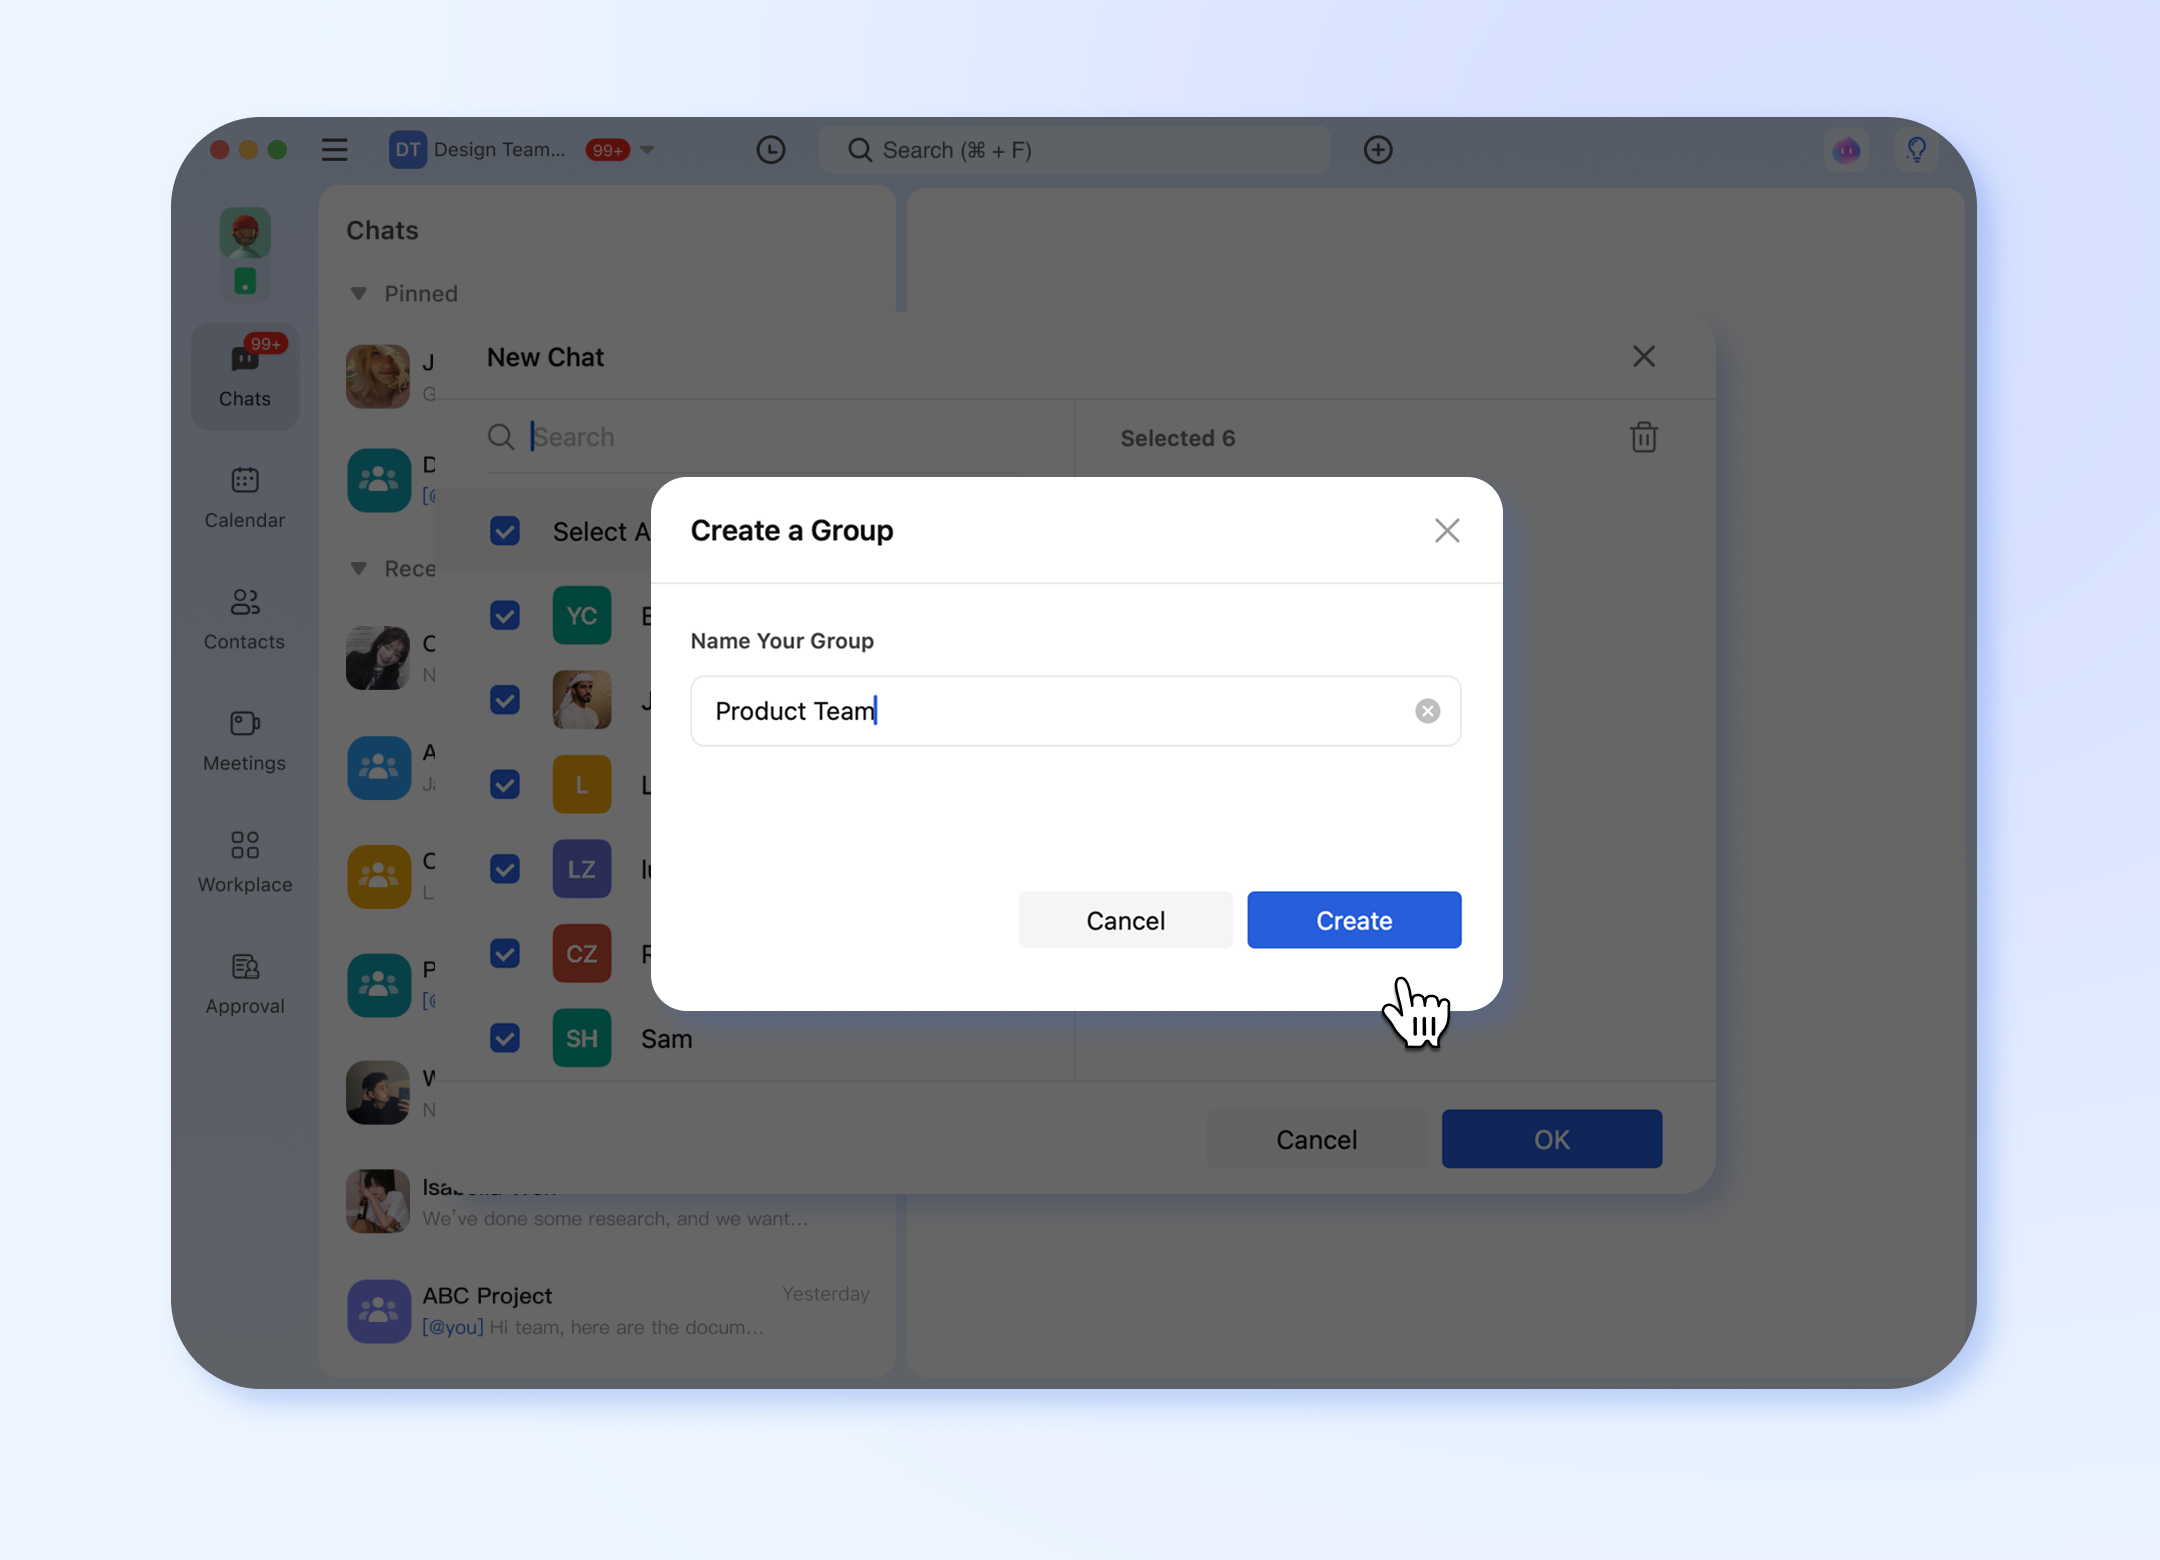
Step 3: Name and Create
A final pop-up will appear.
- Enter a Group Name (40-character limit).
- Review the list of selected members.
- Click Create to complete the process.
This method is best when you start with a list of people and then decide on a group name.
Step 1: Initiate a New Chat
Click the + button and click Creat New Chat.
Step 2: Select Members
You will be taken directly to the company directory.
- Select members individually by clicking on their names.
- Alternatively, use Select All: Click the Select All button to add all employees in the current view or directory.
- ⚠️Important Notice:** If you are about to add everyone to this group. Please confirm this is necessary before proceeding.Please use this feature with caution.
- After selecting members, click OK.
Step 3: Name and Create
A final pop-up will appear.
- Enter a Group Name (40-character limit).
- Review the list of selected members.
- Click Next to complete the process.
Method B: "New Group" (Name First)
- 💻Desktop Users
- 📱Mobile Users
This method is best when you have a specific project or topic in mind and want to define it before adding members.
Step 1: Initiate Group Creation
Click the + button in the main interface and select New Group from the menu.

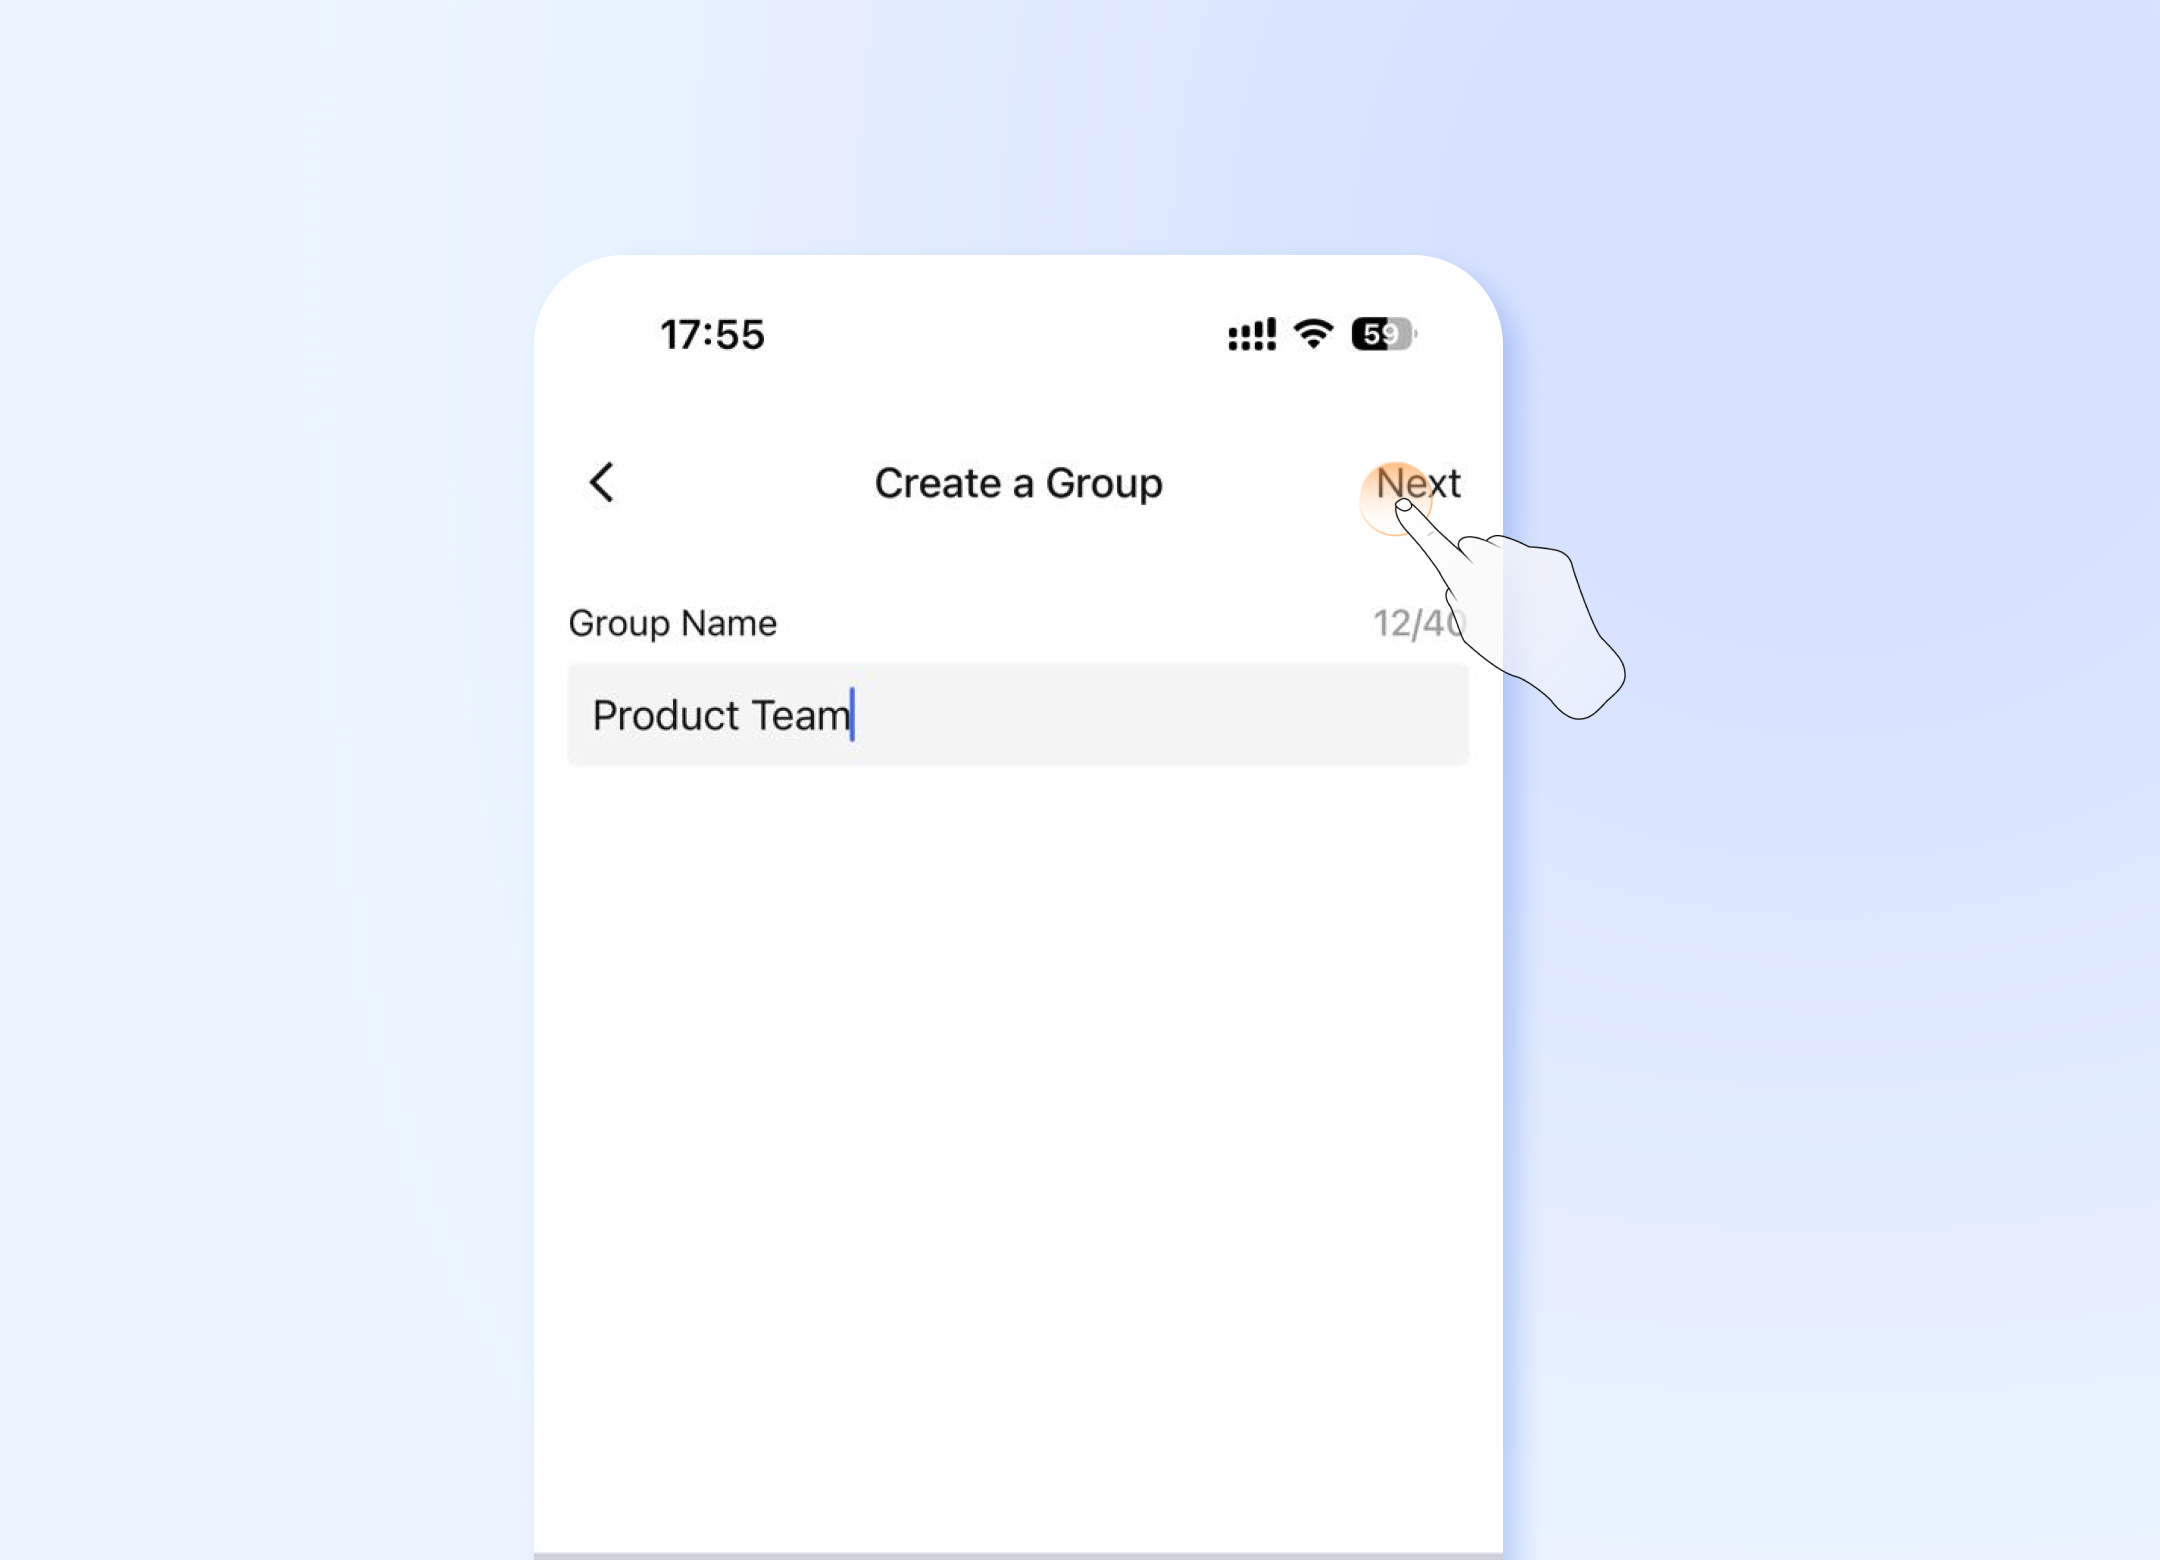
Step 2: Name Your Group
A pop-up window will appear.
- Enter your desired Group Name (e.g., "Q4 Marketing Campaign").
- Group names have a 40-character limit. The counter will show your remaining characters.
- Click Next to proceed to select members.
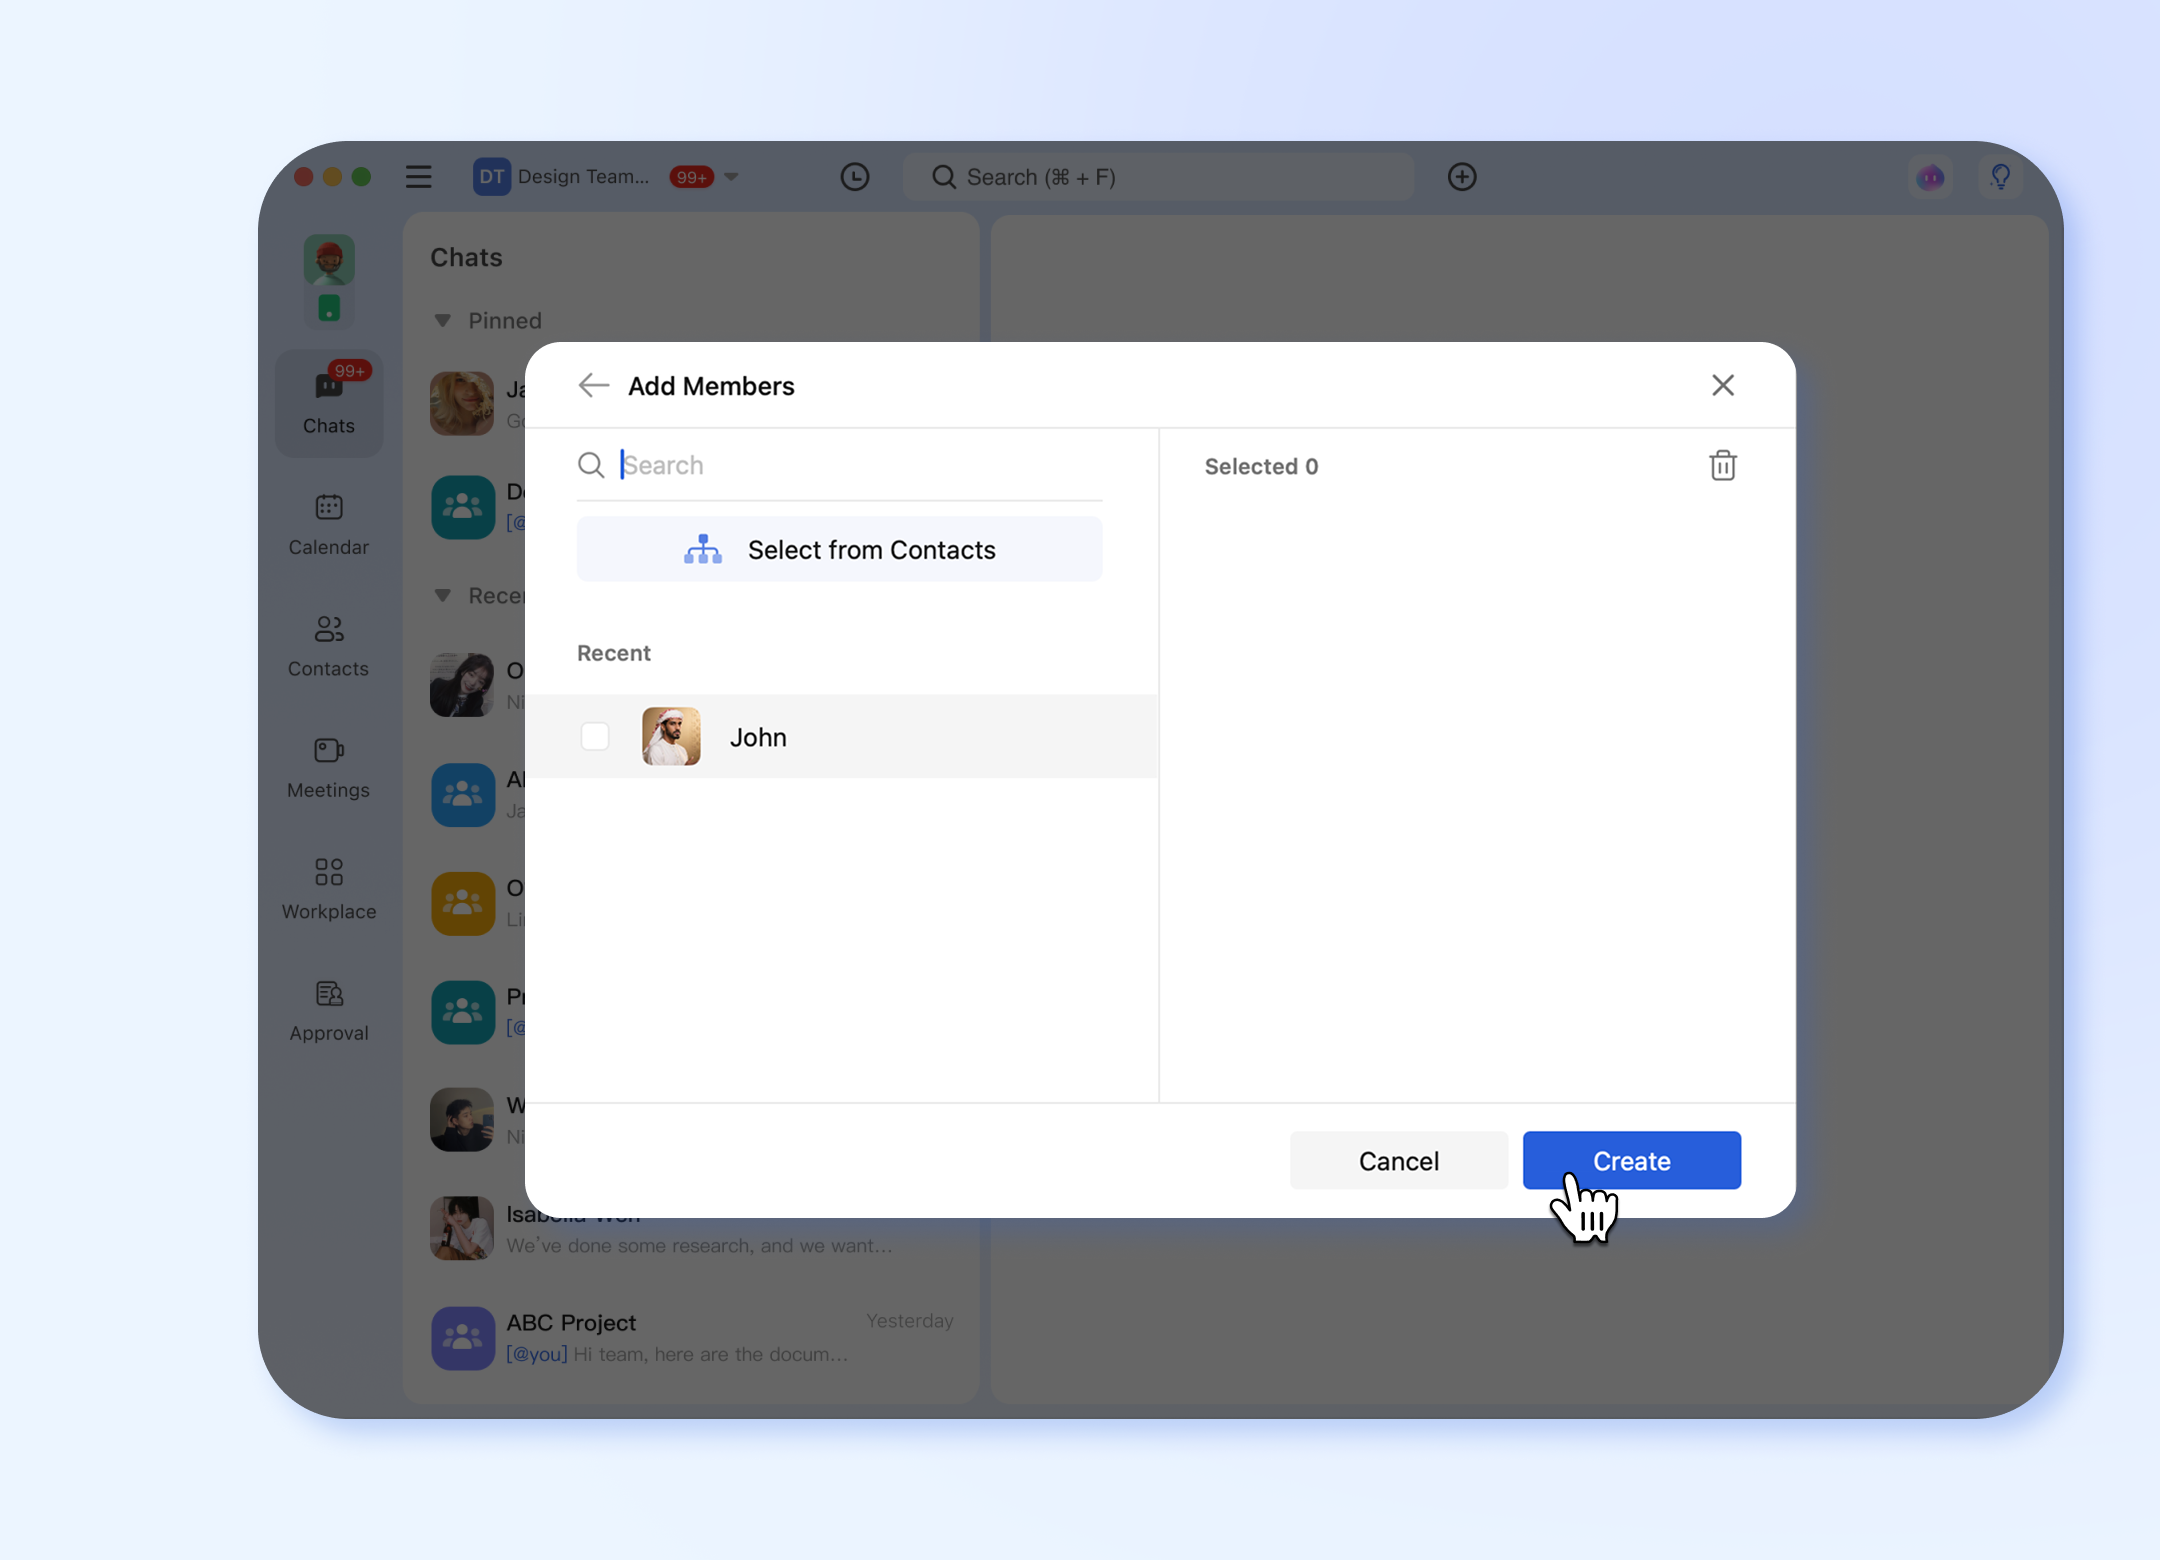
Step 3: Select Members
You will now see the company directory.
- Browse or search for colleagues.
- Select members** by clicking on their names. A checkmark will appear next to each selected person.
- You can select multiple members.
- Click the Create button to finish.
This method is best when you have a specific project or topic in mind and want to define it before adding members.
Step 1: Initiate Group Creation
Click the + button in the main interface and Click Creat New Group from the menu.
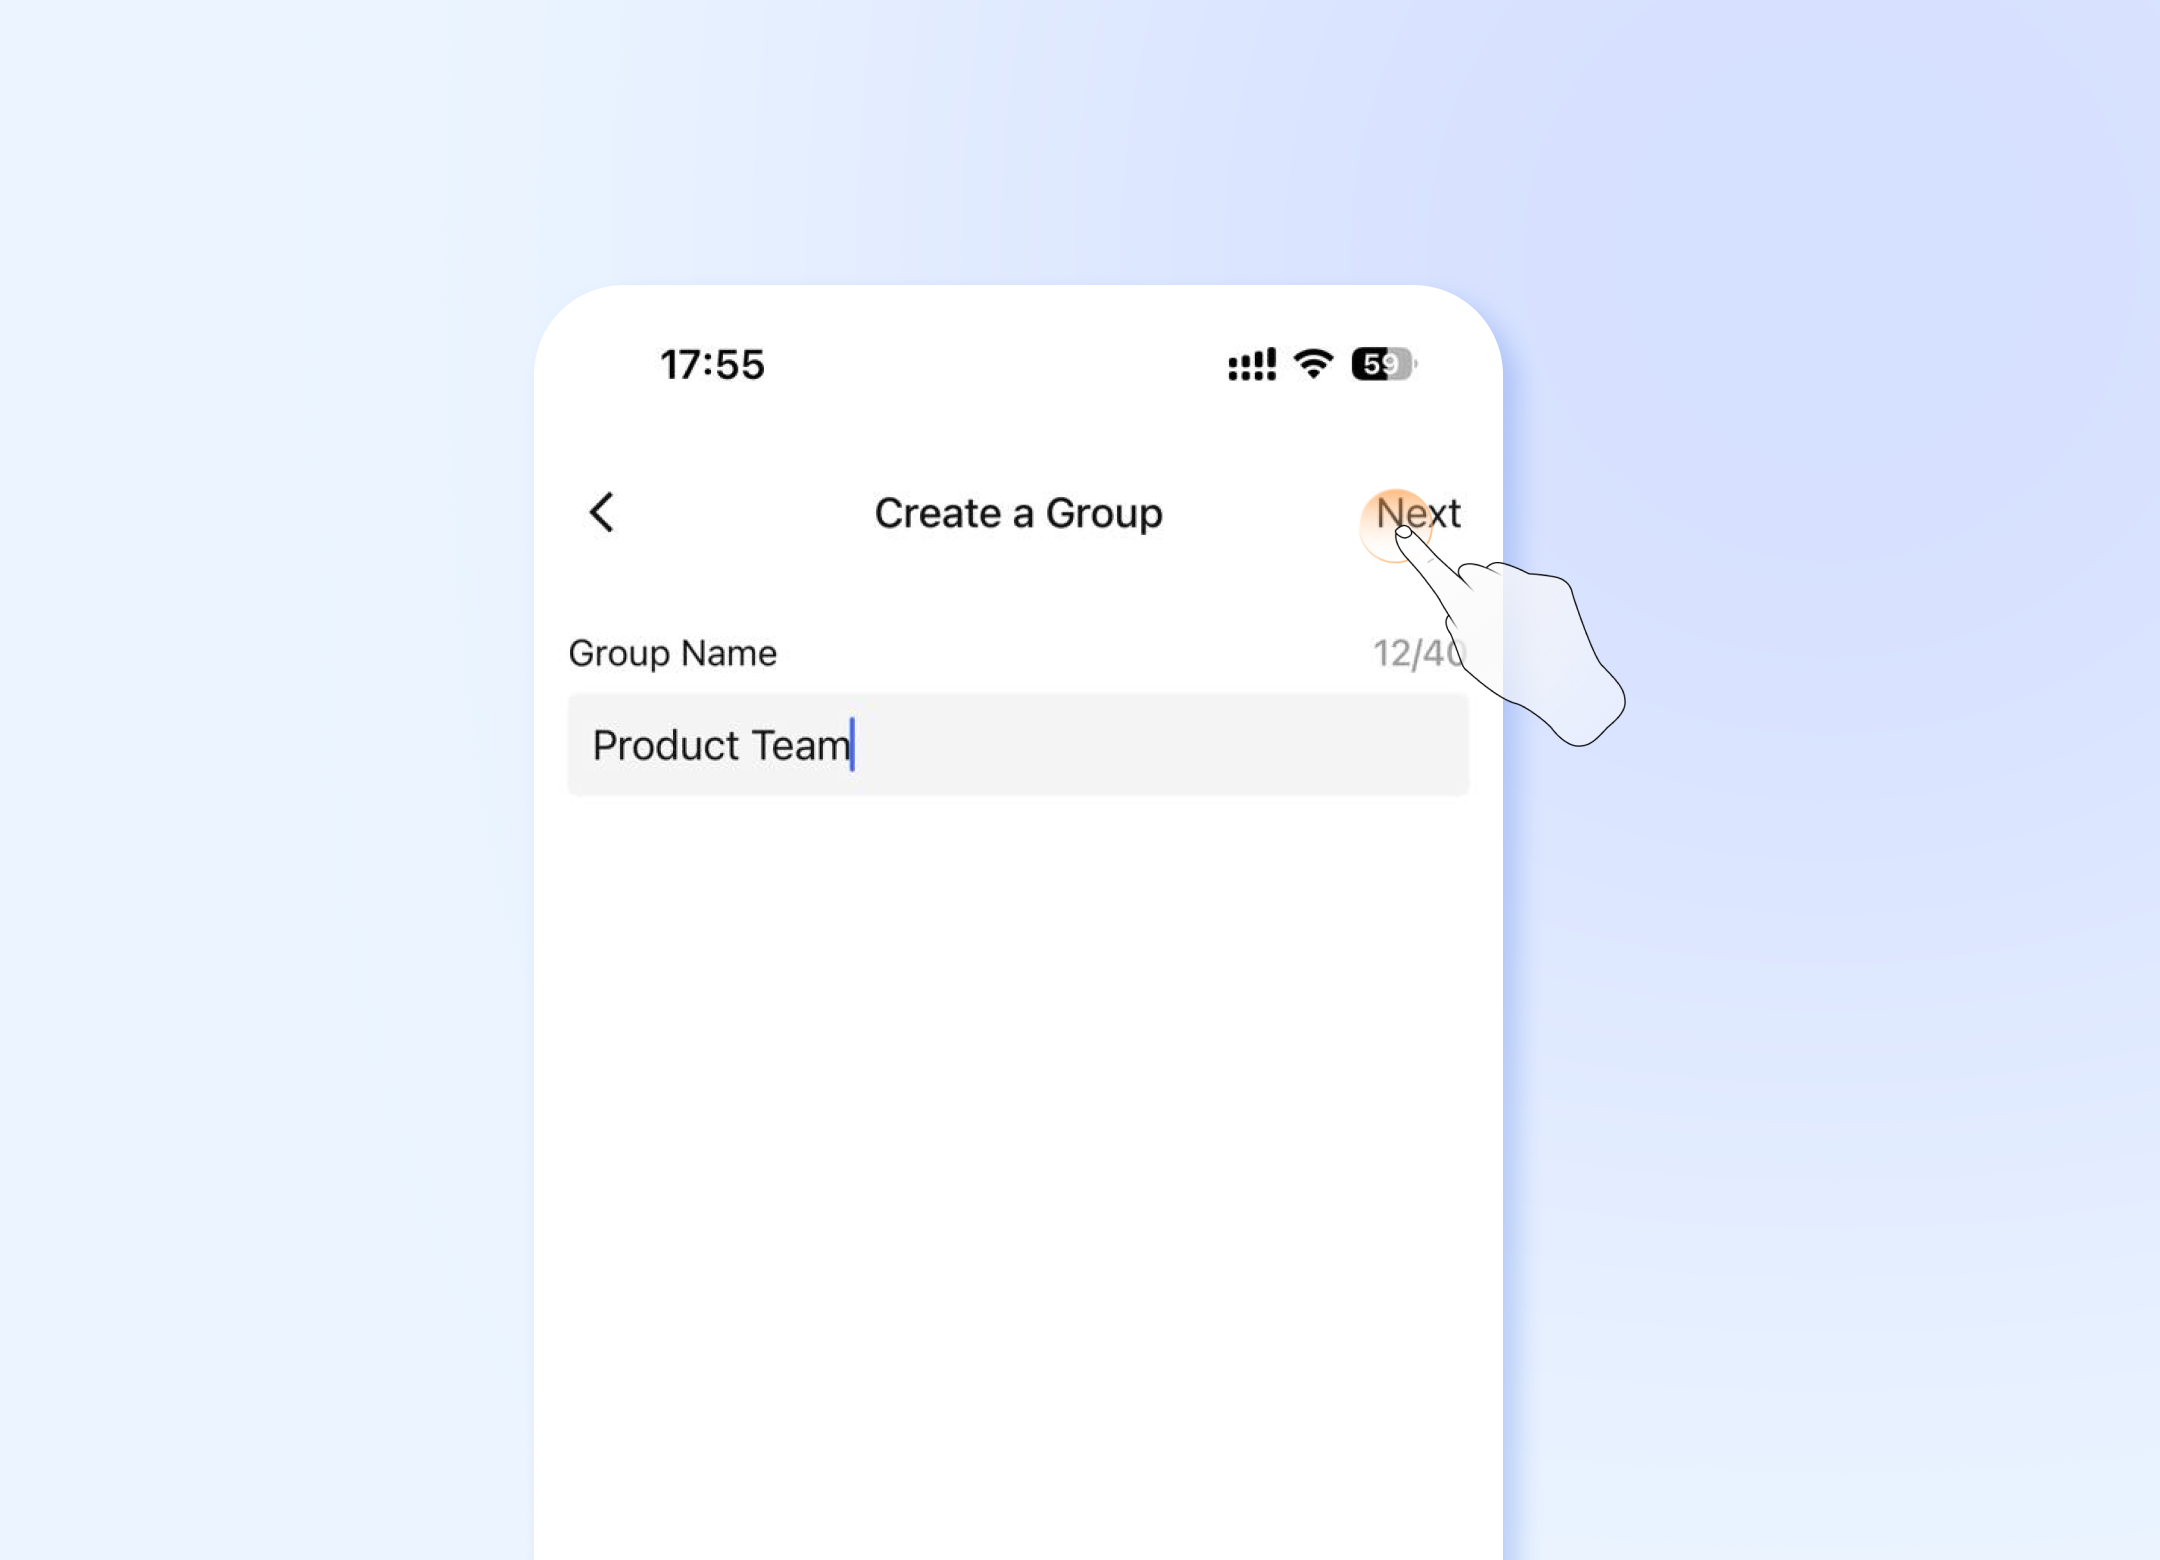
Step 2: Name Your Group
A pop-up window will appear.
- Enter your desired Group Name (e.g., "Q4 Marketing Campaign").
- Group names have a 40-character limit. The counter will show your remaining characters.
- Click Next to proceed to select members.
Step 3: Select Members
You will now see the company directory.
- Browse or search for colleagues.
- Select members by clicking on their names. A checkmark will appear next to each selected person.
- You can select multiple members.
- Click the OK button to finish.
Completion
Once created, you will be redirected to the new group chat window where you can start conversing with your colleagues immediately.
Troubleshooting & Notes
- Network Issues: If you click a button and nothing happens, please be patient. Buttons will be disabled temporarily after clicking to prevent duplicate requests.
- Error Message: If there is a network problem, a red error message will appear at the top of the screen: "Please check your network and try again."
- Please wait after clicking any button. Do not click multiple times.
- Group Name Limit: Group names cannot exceed 40 characters.
- Member Management: You can always add or remove members after creation by clicking on the group's name and managing its settings.
Frequently Asked Questions (FAQ)
Q1: What's the main difference between "New Group" and "New Chat"?
A: The key difference is the order of operations:
- New Group: You name the group first (ideal for a specific project like "Q3 Budget Planning"), then select members from the company directory.
- New Chat: You select members first (quick for ad-hoc conversations), then name the group. This path also includes a "Select All" option.
Q2: What is the maximum number of people I can add to a group?
A: The maximum number of members allowed in a group is determined by your company's subscription plan and system settings. The default member limit is 200. If you need to create a larger group, please contact your company's system administrator to check your current permissions.
Q3: I clicked "Create" but nothing happened. What's wrong?
A: This is likely due to a slow network connection. The button is disabled temporarily after clicking to process your request. Please do not click again. Just wait a moment. If the network request fails, a red error message will appear at the top of your screen.
Q4: Can I create a group without a name?
A: No. A group name is mandatory to help members easily identify the purpose of the conversation. The system will prompt you to provide one (up to 40 characters) before the group can be created.
Q5: Can I change the group name after it's been created?
A: Yes. After the group is created, you can click on the group's name at the top of the chat window to access settings and edit the group name.
Q6: What happens if I lose my internet connection while creating a group?
A: If the connection is lost after you click "Create," the group will not be created. Once your connection is restored, you will need to start the process again. The app will show a clear error message informing you of the network failure.
Q7: I added the wrong person. How can I remove them?
A: During the creation process, you can de-select a member by clicking their checkbox again. After the group is created, you can go into the group's settings to remove members.